

The screenshot is an image of a computer or mobile screen showing certain files at a given moment in time.
Screenshots can also be referred to as a screencast, screen capture, or screen grab.
One can save an image or data that he/she has seen on their computer or mobile screen so that the information can be shared in future with the friends, relatives, or colleagues with the help of screenshots.
I myself take screenshots from my computer and laptop to make content and infographics more user-friendly before uploading them to the blog.
Nowadays each and every smart device especially the one that is used for communication purposes have a feature like a screenshot.
Why Screenshot?
Here we have discussed why to take screenshots and different reasons:
Taking screenshots of the thing that is appeared on the screen has become a new fashion.
Screenshots can be used for various purposes they can be used in offices to save information or it is also helpful for students to make notes, particularly while doing their online classes and not only that an ordinary person can take screenshots of any product they want for the similar design, daily information, chats of their friends, etc.
Don’t get confused between photographs and screenshots being they both are images that can be seen on a device or displayed but they both are totally different as pictures are only the actual pictures of anything taken by a camera and screenshots can be of anything either photos, files, data, etc that is visible on the screen.
The feature of screenshots on devices at present date has become so much helpful because one can easily save the actual thing they are watching on their screen which may not have the saving option.
When I personally learn something with my teacher, I used to screenshots so many times from Zoom windows to make notes.
Moreover, screenshots can be shared conveniently, it can act as illustration material that would otherwise be hard to illustrate verbally.
In this modern era, everybody is aware to take screenshots on their mobile phones but only a few may know the way to take screenshots on their computers. Here we are going to discuss how to take screenshots on a laptop.
Screenshot on a Windows Laptop and Desktop
Below are the quick steps on how you can Screenshot on a Windows Laptop and Desktop:
1. Click Print Screen
If you want to take screenshots of anything on your computer, open the tab or windows and simply click the button “Print Screen“. You can simply find this button on your keyboard.
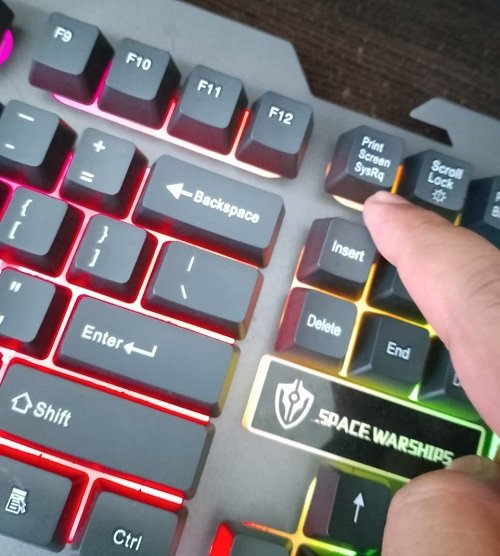
Print Screen
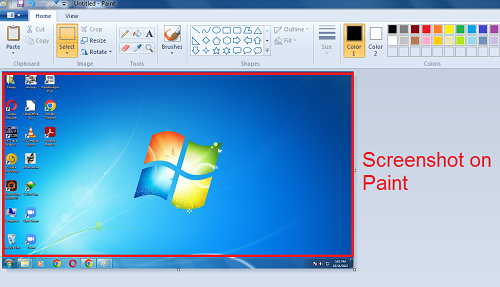
2. Paste to MS Paint Software
Once you click Print Screen, You CTRL+V in to paint or photoshoot to view the screenprint copy. Crop, edit and save the image file.
How to Take Screenshots on a Mac
There are many ways to take screenshots on Mac and Linux.
- Open Online Screenshot Software From Browser
There are many free screenshot software that is found online. In my opinion, Pinetools screenshot software is best for Mac. Click the link to go on their tools. These are free.
- Click “Capture”
You will see a small setting icon with the green button “Capture” Click there.

- Share the Screen
Once you click “capture“, Popup windows will be opened. You can share the entire screens, Windows, or browser tabs for taking screenshots.
Choose any options and click “Share” as shown in the image below.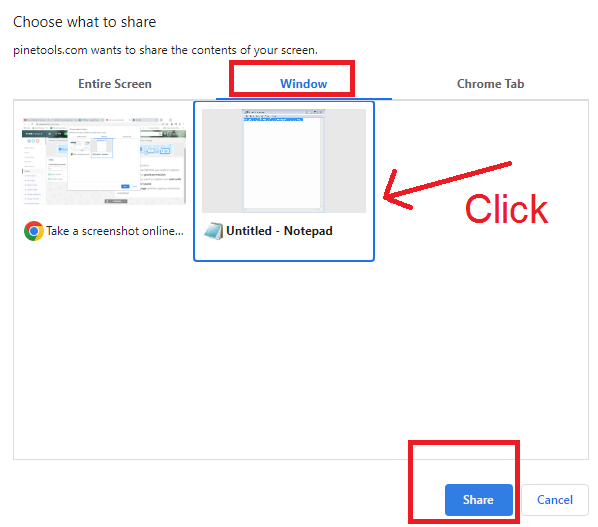
- Wait for the File
Now, It will start creating a screenshot. You can set up a timer and turn off the beep sound too.
Once you are done, Your screenshot will be available below to download on PNG, JPG, or WEBP files.